Hello, hello!
In honor of my crazy week of school, today I have a guest post for you all from my friend Stepfanie! Stepf and I originally became friends via email when she approached me about doing some guest posts for dailySpark. We then met in person out in San Francisco at the Foodbuzz Festival last November! She’s wonderful and I’m excited to feature her here on the blog 🙂 I figured Stepf’s guest post on the best yoga stretches for athletes was very timely considering a lot of us are training for spring races, and stretching should be included in every training plan! Without further adieu… take it away, Stepf!
~ ~ ~
Guest Post: The Best Stretches for Athletes
by: Stepfanie
~ ~ ~
Hi, FANNEtastic Food readers! It’s Stepfanie Romine, editor of SparkPeople’s healthy living blog dailySpark.com and co-author of SparkPeople’s forthcoming cookbook.
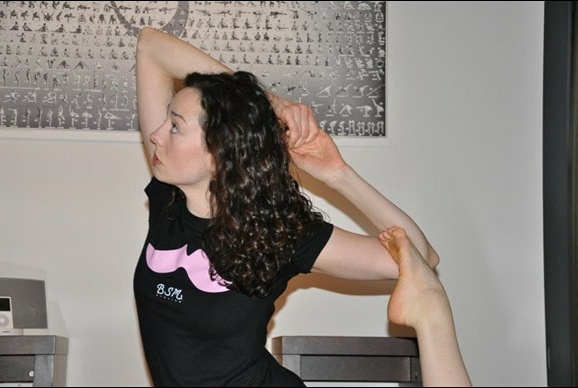
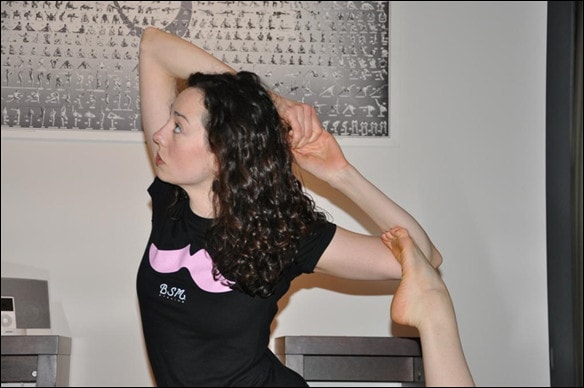
In addition to my duties at SparkPeople, I’m also a yoga teacher and a runner. I am currently training for my first marathon, and I have a regular Ashtanga yoga practice. I teach a weekly class that’s aimed at athletes, especially runners and cyclists (my boyfriend, Sam, co-founded Cincinnati’s premier amateur cycling team, BSM Cycling)!
Today I’m going to share with you some of my favorite stretches for athletes. These poses are guaranteed to keep your hips and hamstrings open.
Before you begin, remember these precautions:
· Do not start a yoga routine or any other workout without clearance from your doctor.
· These poses are not suitable for pregnant women.
· Each pose should be done in a slow and controlled manner, without bouncing or forcing, which can cause your muscles to tighten, increasing your risk of injury. Stretch in a slow, steady motion to the point of “mild discomfort.” If you are stretching to the point of pain, you have stretched too far. Learn to “respect your edge” — never go beyond it.
· This routine can be integrated into a post-run stretching routine. You can also do it any time of day. If you’re not doing the stretches immediately following a workout, I recommend a 10-minute cardio warmup before starting this routine. Warm muscles are easier to stretch.
· A breath is one full inhalation and one full exhalation through the nose. Hold each pose for five breaths, or longer if you’d like.
~ ~ ~
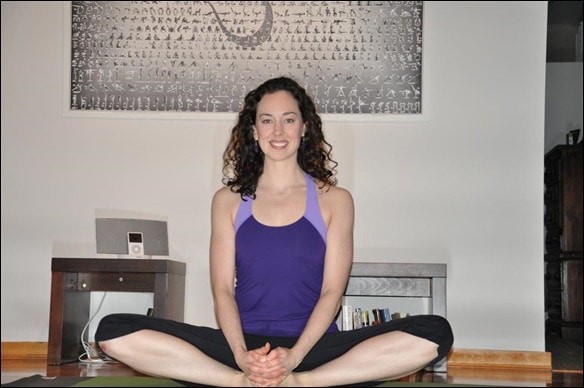
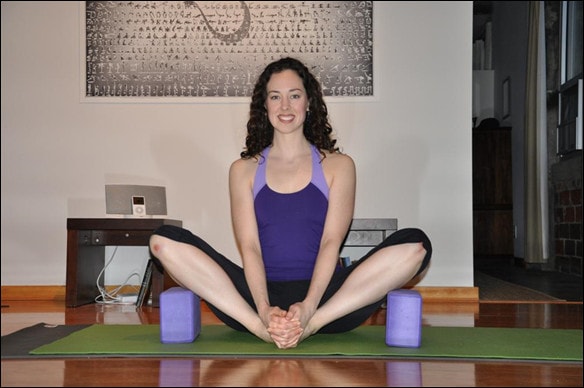
1) Butterfly/cobbler stretch (Baddha konasana):
Benefits:
Opens the groin and hips; stretches the inner thighs
Forward folding stretches the back
How to:
· Sitting tall on your mat, bring the soles of your feet together.
· Interlace your fingers and place them around the toes.
· Sit tall, rolling the shoulders back, and gaze past the end of the nose.
· Lean forward for a deeper stretch, stopping when you start to “feel” the stretch.
· With every inhale, feel your spine growing longer (imagine the crown of your head reaching out in front of you to the wall); with every exhale, allow the body to sink lower (the chest is getting closer to the floor).
TIP: Use blocks under your knees if your hips are particularly tight.
~ ~ ~
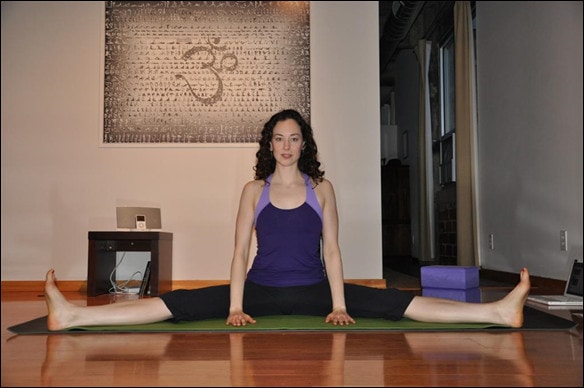
2) Seated wide angle forward fold (Upavistha konasana):
Benefits:
Stretches the hamstrings and calves; the forward fold straightens and lengthens the spine
How to:
· From butterfly pose, extend your legs out to either side of you at a 90 degree angle.
· If you can straighten the legs, flex the feet, and engage the quadriceps (by lifting your knee cap) to keep your knees from locking.
· Lean forward slightly and place your hands on the mat.
· With every inhale, feel your spine growing longer (imagine the crown of your head reaching out in front of you to the wall); with every exhale, allow the body to sink lower (the chest is getting closer to the floor).
TIP: Bend your knees as much as you need to, and bring the legs closer together if needed.
~ ~ ~
3) Cow-face fold (Gomukhasana):
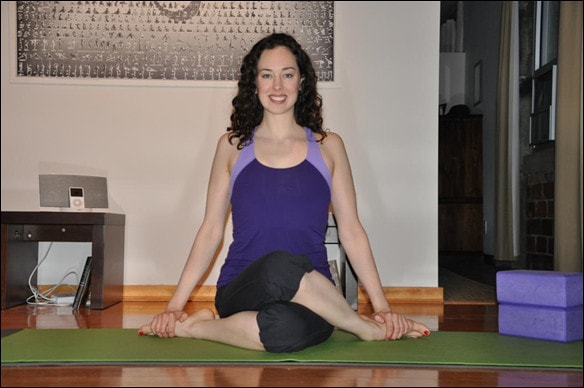
This is one of my favorite poses! It’s incredibly effective for stretching the pirifomis, a small muscle deep in your glutes, and the top of the IT band.
Benefits:
Stretch out your glutes and hips — including the hard-to-reach deep muscles — and your IT band.
How to:
· From a seated position, bring your left foot back by your right hip; stack your right knee on top of your left, with your right foot by your left hip. (If your hips are tight, your top leg/knee might stand rather than lie flat — that’s OK.)
· Grab your feet with your hands (left foot in right hand; right foot in left), and lean forward slightly, gazing past the end of your nose.
· For a deeper stretch, flex your feet. You can also place your hands on the floor in front of you and lean forward to intensify the stretch.
· Repeat on the other side, with the left knee on top this time.
TIP: Make sure both hips stay on the ground in this pose.
~ ~ ~
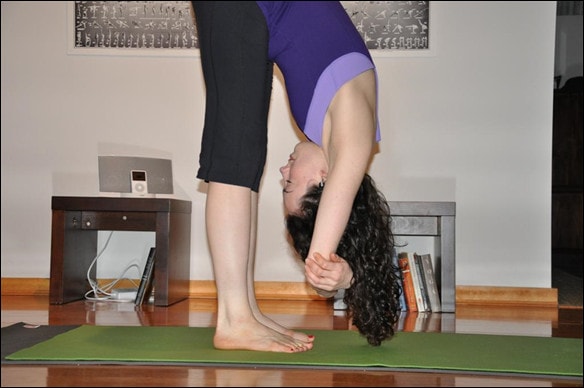
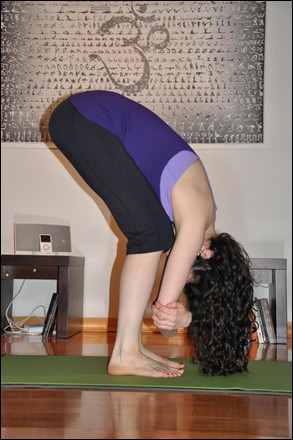
4) Standing forward fold with “ragdoll” arms (Uttanasana):
Benefits:
Stretches the hamstrings and straightens the spine.
How to:
· Inhale and take your hands to your hips as you step your feet hips’ width apart.
· Exhale, fold forward. If you can straighten your legs in this pose, grasp each elbow with the opposite hand. If you can’t straighten your legs or need more support, place your hands on a yoga block (or even a chair, if you prefer).
· Allow your head to hang down limply–like a ragdoll, straightening your spine. Gaze past the end of your nose.
TIP: Keep your knees slightly bent if your hamstrings are tight. If you straighten your legs, take care not to lock your knees. For a deeper stretch, engage the quadriceps by lifting up on your kneecap.
~ ~ ~
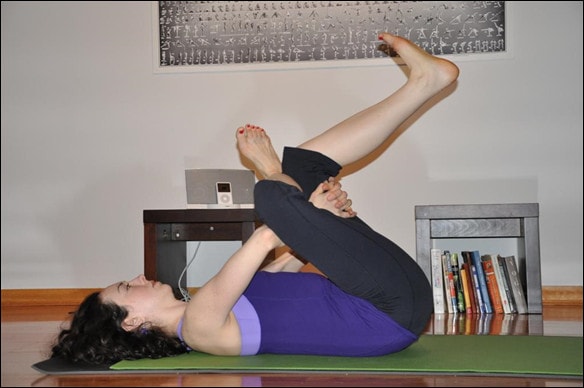
5) Figure 4 pose (Sucirandhrasana):
Benefits:
Stretches the outside of the hips and the inner thighs.
How to:
· Lie on your back on the mat.
· Bring your knees in towards the chest, at a 90-degree angle.
· Place your right ankle on your left thigh, interlace your fingers and place them behind your left thigh, and pull your left thigh towards your chest.
· Repeat on the other side.
TIP: Flex your feet to deepen the stretch. Press your elbow against that bent knee to feel an inner thigh stretch. If you have knee problems, adjust the angle of the knee so you feel comfortable.
~ ~ ~
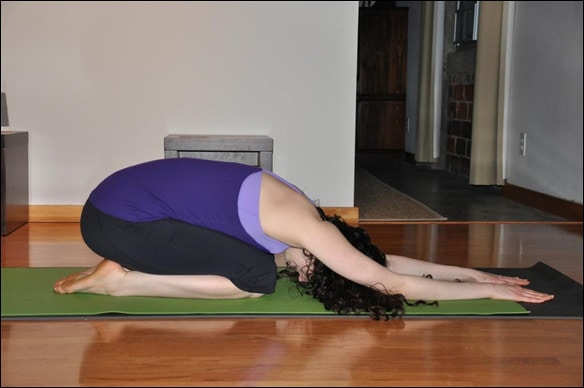
6) Child’s pose (Balasana):
Benefits: Stretches hips, thighs and ankles gently; can help alleviate back pain.
How to:
· From hand and knees, start to lower to the floor, shifting hips back and extending arms out in front of you. Your belly will rest on or between your thighs, and your forehead will reach towards the mat. (Place a towel under your forehead if it won’t reach the floor.
· Stretch the arms out in front of you to feel a stretch up the length of the back.
· Stretch the arms alongside the body, with the fingertips facing the toes, to stretch between the shoulder blades.
TIP: Roll your forehead back and forth across the mat with your arms along your sides to help alleviate sinus congestion.
Big thanks to Sam Klontz, my photographer and a fellow yogi, for his help with this post!
For more yoga tips and posts from Stepf, visit dailySpark.com!
~ ~ ~
Thanks for the great guest post, Stepf! I’ve been including yoga in my half marathon training at least once per week, and often throwing in extra stretching, as well! I find it really helps with my recovery and just makes me feel good. I can’t believe I used to go through life without stretching 🙂
I just spent an hour walking around my neighborhood while studying flashcards — fresh air, exercise, AND studying all wrapped into one. Multitasking is key during busy weeks like this! I’m now off to my Medical Nutrition Therapy closed book exam — wish me luck!
p.s. If you’re on Facebook, make sure that you’ve “liked” fANNEtastic food… I’ll be hosting another fun giveaway on my wall later today 🙂


